Remotely Update Raspberry Pi: Download & Manage Like A Pro!
Are you wrestling with the complexities of keeping your Raspberry Pi projects up-to-date, especially when they're scattered across different locations? Remote management and updates are not just convenient; they are essential for efficiency, security, and the overall health of your systems.
Managing a Raspberry Pi remotely is undeniably one of the most convenient and efficient ways to keep your projects updated and running smoothly. This is especially true when you consider the scenarios of multiple deployments, geographically dispersed devices, or even projects where physical access is limited. The ability to update software, apply security patches, and make necessary adjustments without being physically present is a game-changer for both hobbyists and professionals.
If you're looking for the best solutions for remote Raspberry Pi updates, this comprehensive guide provides all the necessary information. From grasping the fundamental concepts to exploring advanced techniques, we've covered everything you need to know. Whether you're a beginner or an experienced user, this resource will help you manage your Raspberry Pi remotely with ease.
At its core, a remote Raspberry Pi update is simply the process of updating your Pi's software or firmware without physical presence. This can involve installing new software packages, applying security patches, upgrading the operating system, or even modifying configuration files. These updates are critical for several reasons, including:
- Security: Regular updates patch security vulnerabilities, protecting your Pi from potential threats.
- Performance: Updates often include performance improvements, optimizing your Pi's operation.
- Compatibility: Keeping your software up-to-date ensures compatibility with the latest hardware and software.
- Feature Enhancements: Updates can introduce new features and functionalities, enhancing your Pi's capabilities.
The need for remote updates becomes even more pronounced when dealing with multiple Raspberry Pi setups, perhaps spread across various locations. Imagine the logistical nightmare of manually updating each device! Remote updates eliminate this burden, saving you time and effort while ensuring your systems remain secure and optimized. This is particularly relevant for IoT devices, where regular updates are crucial to maintain functionality and security.
As the world of IoT (Internet of Things) technology continues to evolve at an accelerated pace, it is imperative for IT administrators to proactively plan for device updates, especially concerning IoT devices and Raspberry Pi setups. Vendors frequently release vital fixes, security patches, and feature enhancements for software, device controllers, and firmware. These updates are released at any time, requiring IT administrators to have robust strategies in place.
If you're just starting your journey into the world of Raspberry Pi and are curious about managing remote updates, you've arrived at the right place. This guide will provide you with the necessary tools, methods, and best practices to manage your Raspberry Pi remotely like a pro. Now, you have access to professional tools to update your devices remotely, streamlining your workflow.
One of the easiest ways to update your Raspberry Pi is to update its operating system. Most operating systems used on the Pi are based on Debian, including the official Raspberry Pi OS and Ubuntu Server. Fortunately, several methods exist for performing these updates remotely.
Now, if you're wondering what the best options for remote Raspberry Pi updates are, don't worry! This article will explore various tools, methods, and best practices to help you manage your Raspberry Pi remotely like a pro.
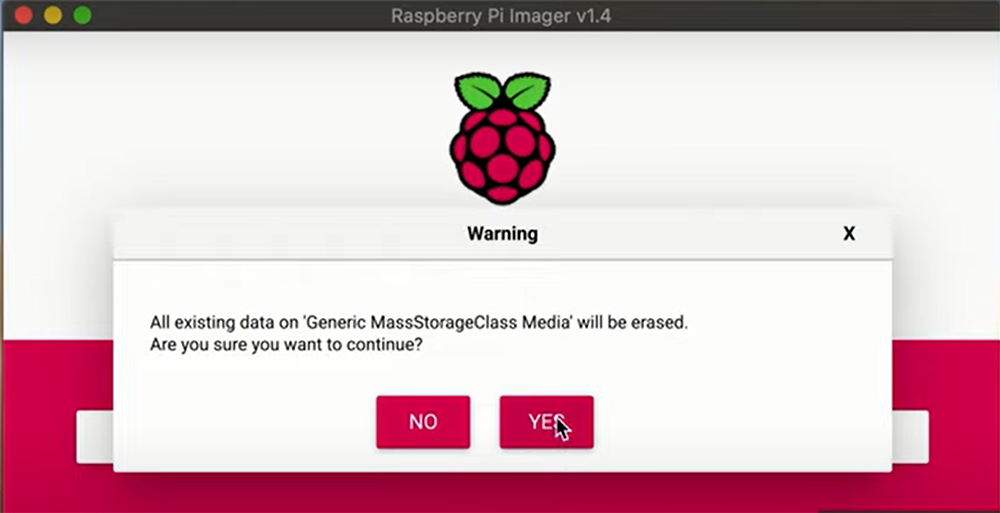
Before diving into remote update methods, let's briefly cover how to get your Raspberry Pi up and running with a fresh OS. The Raspberry Pi Imager is a quick and easy way to install Raspberry Pi OS and other operating systems to a microSD card, which is then ready to use with your Raspberry Pi. Simply download and install the Raspberry Pi Imager on a computer with an SD card reader. Then, insert the SD card you intend to use with your Raspberry Pi into the card reader.
Here's a quick overview of setting up the Raspberry Pi Imager:
- Download and install Raspberry Pi Imager on your computer.
- Insert the microSD card into your computer's card reader.
- Open the Raspberry Pi Imager.
- Choose your OS (e.g., Raspberry Pi OS).
- Select your microSD card.
- Click "Write" to install the OS.
Once the OS is written, you can configure SSH (Secure Shell) to enable remote access.
To enable SSH during the initial setup:
- After writing the OS image to the SD card, but before inserting it into your Pi, open the boot partition (usually called "boot") on your computer.
- Create an empty file named "ssh" (no file extension). This enables SSH by default.
- (Optional) Create a file named "wpa_supplicant.conf" to configure Wi-Fi.
- Insert the SD card into your Raspberry Pi and boot it up.
Enabling SSH is the first crucial step in enabling remote access. SSH provides a secure way to access your Raspberry Pi's command line from another computer on the same network (or even over the internet, with appropriate configuration). To enable SSH, you can use the Raspberry Pi Imager.
Enabling SSH with Raspberry Pi Imager:
- After selecting the OS, click on the gear icon (settings).
- Enable SSH.
- Set a username and password.
- Configure Wi-Fi if needed.
- Save the settings and write the OS to the SD card.
Managing your Raspberry Pi remotely offers several advantages, including convenience, efficiency, and improved security. With SSH enabled, you can connect to your Raspberry Pi from any computer on the same network. This means you can install new software, apply security patches, and even upgrade the operating system without needing physical access to the device.
The ability to remotely update your Raspberry Pi is crucial for several reasons:
- Time-Saving: You dont need to physically go to the location of the Raspberry Pi.
- Efficiency: Updates can be scheduled and automated.
- Security: Regular updates patch security vulnerabilities.
- Scalability: Easy to manage multiple Raspberry Pi devices.
For connecting to your Raspberry Pi remotely, you'll need a computer with an SSH client (most Linux and macOS systems have this pre-installed). For Windows, you can use PuTTY or the Windows Subsystem for Linux (WSL). To start, ensure both your Raspberry Pi and your computer are connected to the same network.
Connecting via SSH:
- Find your Raspberry Pis IP address (you can typically find this via your routers admin interface or by connecting a monitor and keyboard to the Pi).
- Open your SSH client (e.g., PuTTY on Windows, terminal on macOS/Linux).
- Enter your Raspberry Pis IP address and connect.
- Enter your username and password when prompted.
- You should now be connected to the command line of your Raspberry Pi.
Once connected, you can update your system using the following commands:
sudo apt update(Updates the package lists)sudo apt upgrade(Upgrades installed packages)sudo apt full-upgrade(Upgrades the entire system, including the kernel)sudo reboot(Restarts the Raspberry Pi after updates, if necessary)
For more advanced remote management, consider using solutions like VNC (Virtual Network Computing) or remote desktop software like TeamViewer, which allows you to access the Raspberry Pi's graphical user interface (GUI). This is particularly useful if you need to interact with graphical applications.
To use VNC:
- Install a VNC server on your Raspberry Pi (e.g., RealVNC Server).
- Configure the VNC server.
- Install a VNC client on your computer.
- Connect to your Raspberry Pi using the IP address and password.
For those managing multiple Raspberry Pis, tools like Ansible or similar configuration management systems can be invaluable. With Ansible, you can automate updates and configurations across many devices simultaneously.
If you're managing a large number of Raspberry Pis, a master image approach can streamline the process. By maintaining a single master image, you can push updates to all your devices at once. This method typically involves using imaging software to create an initial SD card image and then deploying it to other devices. Tools like `dd` or `PiShrink` can be used for imaging.
Software solutions, such as TeamViewer, will display the IP address and gateway details of a new device. This makes it possible to select and add the appropriate Raspberry Pi device. To begin a remote connection to the Raspberry Pi from a Mac, the Raspberry Pi must first be registered. Registration is usually done by searching for new devices.
Here's a brief overview of TeamViewer:
- Install TeamViewer on your Raspberry Pi and your computer.
- Create or log in to a TeamViewer account.
- Get the ID and password for your Raspberry Pi from the TeamViewer interface.
- On your computer, enter the Raspberry Pi's ID and connect.
- Enter the password to access the remote desktop.
I currently have 135 Raspberry Pis deployed throughout our company. Almost all of them are set up identically, with the exception of one file. A central question that arises is how to efficiently push updates to all of these devices simultaneously, leveraging a master image I maintain. The goal is to ensure consistency and minimize manual intervention.
For those interested in automating updates, consider creating a script to automate these steps. For example, a simple bash script could perform the update and upgrade steps, then reboot the Pi. You could then execute this script via SSH.
Heres a basic example of a script (save it as `update.sh` on your Raspberry Pi):
#!/bin/bash sudo apt update sudo apt upgrade -y sudo reboot You would then make the script executable: chmod +x update.sh and run it via SSH: ssh pi@your_pi_ip ./update.sh.
Some users employ a Python program to download a version number file from their web server. If the version has changed, the latest Python files are downloaded. This offers a simple yet effective means of updating files remotely.
This approach can be modified to include other files or even whole system updates. Free and open-source tools are widely available for this purpose, offering flexibility and customization options for makers around the globe.
When configuring remote access, its crucial to prioritize security. Use strong passwords, change the default SSH port, and consider using SSH keys for authentication instead of passwords. Regular security audits and monitoring are recommended to maintain a secure system.
For larger deployments, consider a centralized logging and monitoring system to track the health and performance of your Raspberry Pis. Tools like Grafana and Prometheus can provide valuable insights, allowing you to proactively address any issues.
To ensure consistent updates across a fleet of Raspberry Pis, you might explore methods for creating and deploying a master image. This master image can be used to configure the base system, install software packages, and pre-configure settings. It can then be deployed to all devices simultaneously.
Steps for Creating and Deploying a Master Image:
- Prepare a Base System: Install a standard operating system on an SD card for your Raspberry Pi. Configure it with all the necessary software and settings.
- Create the Image: Use imaging software (like `dd` on Linux/macOS or Win32DiskImager on Windows) to create a full image of the SD card.
- Deploy the Image: Use the same imaging software to copy the image to the SD cards of all your Raspberry Pis.
Another useful approach involves integrating with tools that support Over-The-Air (OTA) updates. This is particularly useful for IoT devices. Tools like UpdateHub offer professional-grade solutions for remote device updates.
To integrate your device using UpdateHub, you can access the developers' team via gitter or by emailing contact@updatehub.io.
Remember to check the spelling, or type a new query. The goal is to have all the tools in your hand so you can update all your devices and keep them running smoothly.

