SSH Remote IoT: Secure Access & Management - Your Ultimate Guide!
Can you imagine a world where you can manage your smart devices from anywhere, at any time, without the constant fear of cyber threats? This is not a futuristic fantasy; it's the reality achievable with Secure Shell (SSH) and its application in the Internet of Things (IoT) environment.
This article embarks on a journey into the world of SSH remote IoT device management, providing a comprehensive guide to secure access. The aim is to equip you with the knowledge to set up, configure, and maintain secure connections, regardless of your technical background. Whether you are a seasoned network administrator, a budding developer, or a curious hobbyist, the ability to securely connect to a remote IoT device is a crucial skill in today's interconnected world.
Before delving into the intricate details, let's pause and consider why SSH is so vital. As the IoT ecosystem continues to expand, so does the need to secure our devices. With the increasing number of connected devices, the potential attack surface grows, making it imperative to implement robust security measures. SSH provides a secure and reliable solution to this challenge. By leveraging its key features, including authentication, encryption, and integrity verification, SSH ensures that all communication between your devices and yourself is protected from prying eyes.
This tutorial serves as a detailed walkthrough of SSH remote access for IoT devices. Well explore the fundamentals, from the basics to advanced configurations, ensuring your IoT setup is both secure and efficient. Understanding the principles of SSH and its application in remote IoT environments is the first step. By the end of this guide, you'll have a solid understanding of SSH remote IoT, including setup, configuration, and best practices for maintaining secure connections. From troubleshooting issues and deploying updates to simply monitoring system performance, a reliable SSH server is indispensable.
Let's break down the key aspects of SSH and its role in remote IoT device management.
What is SSH and Why is it Important for IoT?
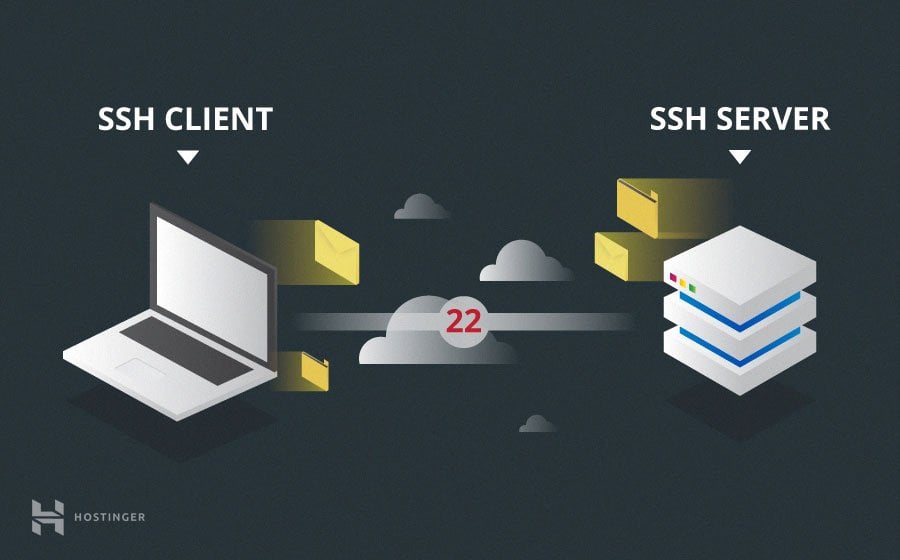
SSH, or Secure Shell, is a cryptographic network protocol that enables secure communication over an unsecured network. At its core, SSH establishes a secure channel between a client and a server, encrypting all data transmitted between them. This encryption ensures that sensitive information, such as usernames, passwords, and data being transferred, is protected from eavesdropping or tampering. In the context of IoT, SSH is crucial for the following reasons:
- Secure Remote Access: SSH allows you to securely access your IoT devices from anywhere in the world. You can manage, configure, and troubleshoot your devices without being physically present.
- Data Encryption: All data transmitted through an SSH connection is encrypted, protecting it from interception and ensuring the privacy of your data.
- Authentication: SSH provides strong authentication mechanisms to verify the identity of the user or device attempting to connect. This prevents unauthorized access to your IoT devices.
- Integrity Verification: SSH ensures that the data transmitted has not been altered during transit.
- Command Execution: You can securely execute commands on your IoT devices remotely, allowing you to perform maintenance tasks, deploy updates, and control the device's functions.
These features make SSH an ideal choice for remote IoT device management, where security is paramount. The ability to remotely access and manage IoT devices is invaluable for various applications, including home automation, industrial monitoring, and smart agriculture.
Setting up SSH on IoT Devices
Before you can access your IoT devices remotely via SSH, you need to ensure that SSH is installed and configured properly. The setup process varies depending on the operating system running on your IoT device. Here's a general guide:
1. Installing SSH Server:
- Linux-based Devices: Most IoT devices run on Linux distributions. The SSH server package is typically `openssh-server`. To install it, open a terminal and use the package manager appropriate for your distribution (e.g., `apt` for Debian/Ubuntu, `yum` or `dnf` for CentOS/Fedora). For example:
sudo apt updatesudo apt install openssh-server- Windows-based Devices: On Windows, you can install an SSH server like OpenSSH, which is now a built-in feature in Windows 10 and later versions, or use third-party SSH servers like Cygwin or MobaXterm.
2. Configuring SSH Server:
- Configuration File: The main configuration file for OpenSSH is usually located at `/etc/ssh/sshd_config`. You may need to edit this file to customize SSH settings.
- Port Number: By default, SSH uses port 22. It's a good security practice to change the default port to a less common one. To do this, modify the `Port` directive in the `sshd_config` file.
- Authentication: Configure authentication methods. You can use password-based authentication (though it's less secure) or, preferably, public key authentication. Public key authentication is more secure.
- AllowUsers/DenyUsers: You can restrict SSH access to specific users or groups. Use `AllowUsers` to specify which users can connect and `DenyUsers` to explicitly deny access to certain users.
3. Public Key Authentication (Recommended):
- Generate Key Pair: On your client machine (the device you will use to connect to your IoT device), generate an SSH key pair using the command:
ssh-keygen -t rsa- This will create two files: a private key (`id_rsa`) and a public key (`id_rsa.pub`).
- Copy Public Key: Copy the content of your public key (`id_rsa.pub`) to the `authorized_keys` file on your IoT device. This file is typically located in the `.ssh` directory within the user's home directory (e.g., `/home/user/.ssh/authorized_keys`).
- You can use the `ssh-copy-id` command to automate this process:
ssh-copy-id user@your_iot_device_ip
4. Firewall Configuration:
- Make sure your firewall allows SSH traffic on the specified port. If you changed the port number, configure your firewall to allow traffic on that port instead of the default port 22.
5. Restart SSH Service:
- After making any changes to the `sshd_config` file or enabling public key authentication, restart the SSH service to apply the changes. The command to restart the SSH service varies depending on the system:
sudo systemctl restart sshd # For systemd-based systems (e.g., Debian, Ubuntu, CentOS 7+)sudo service ssh restart # For older systems (e.g., CentOS 6)
Once the SSH server is installed, configured, and running, you can access your IoT device remotely. Open an SSH client on your local machine (e.g., terminal on Linux/macOS, PuTTY or MobaXterm on Windows) and connect to your device using the following command:
ssh user@your_iot_device_ip -p port_numberReplace `user` with your username on the IoT device, `your_iot_device_ip` with the device's IP address, and `port_number` with the SSH port you configured (if its not the default port 22). If you've set up public key authentication, you won't be prompted for a password; otherwise, you'll be prompted for your password.
Troubleshooting Common SSH Issues with IoT Devices
Even with proper setup, you might encounter issues when trying to connect to your IoT devices via SSH. Here are some common problems and their solutions:
- Connection Refused:
- Problem: This error indicates that the SSH server is not running on the IoT device, or the firewall is blocking the connection.
- Solution:
- Verify that the SSH service is running on the IoT device. Use `sudo systemctl status sshd` (for systemd-based systems) or `sudo service ssh status` (for older systems) to check its status.
- Check your firewall rules. Make sure the firewall allows inbound connections on the SSH port (default is 22, or the custom port you set).
- Ensure the IoT device is reachable on the network. Ping the device from your client machine to verify network connectivity.
- Permission Denied:
- Problem: This error usually indicates a problem with authentication, such as an incorrect username, password, or issues with public key authentication.
- Solution:
- Double-check the username and password. Make sure you are using the correct credentials for the IoT device.
- If using public key authentication, verify that the public key is correctly added to the `authorized_keys` file on the IoT device, and the file has correct permissions.
- Ensure that the user account you are trying to log in with has SSH access enabled. Check the `AllowUsers` or `DenyUsers` directives in your SSH configuration file (`sshd_config`).
- Connection Timed Out:
- Problem: This error often occurs when there's a network issue, such as a firewall blocking the connection, or the IoT device is not reachable.
- Solution:
- Check your network connectivity. Ensure your client machine can reach the IoT device on the network.
- Verify your firewall settings. Make sure the firewall allows SSH traffic on the specified port.
- Make sure the IoT device has a static IP address or that its IP address is not changing. If the IP changes, your SSH connection will fail.
- Incorrect IP Address:
- Problem: The IP address used to connect to the IoT device is incorrect.
- Solution:
- Double-check the IP address of your IoT device. You can find it by logging into the device locally and checking its network settings.
- Firewall Blocking Traffic:
- Problem: The firewall on either the IoT device or the network you're connecting from is blocking SSH traffic.
- Solution:
- Configure the firewall on the IoT device to allow SSH traffic on the SSH port (default: 22).
- If you're connecting from a different network, make sure your network's firewall also allows SSH traffic.
Advanced Tips for Optimizing SSH Connections
Once you have a working SSH connection, you can optimize it for performance and security:
- Use SSH Tunnels: SSH tunnels allow you to securely forward traffic from one port on your local machine to a port on the remote IoT device, or even to another device behind it. This can be useful for accessing services running on the IoT device or for securing other network connections.
- Protect Your Private Key: Always protect your private key with a strong passphrase. This will prevent unauthorized access to your IoT devices if your private key is compromised.
- Port Forwarding: Forward traffic from one port to another securely using SSH. This can be useful to access internal services running on your IoT device (e.g., a web server).
- Optimize SSH Configuration: Fine-tune your SSH configuration (`sshd_config`) to improve performance and security. For instance, you can disable password authentication (if you use public key authentication) to enhance security.
- Regular Updates: Keep your SSH server software up-to-date. Regularly update your SSH server packages to patch security vulnerabilities.
- Monitoring: Monitor SSH connection attempts and logs for suspicious activity. Implement logging to track successful and failed login attempts, which can help you identify potential security breaches.
- Use a Non-Standard Port: For added security, change the default SSH port (22) to a less common one. This makes it harder for automated bots to find and attack your SSH server.
Remote IoT Device Management: Everything You Need to Know
Remote IoT device management involves a combination of hardware and software solutions designed to monitor, control, and maintain IoT devices from a remote location. This approach is crucial for several reasons:
- Cost Efficiency: Reduces the need for on-site visits, saving on travel expenses and personnel costs.
- Scalability: Enables the management of a large number of devices distributed across geographical locations.
- Proactive Maintenance: Allows for early detection and resolution of issues, minimizing downtime.
- Security: Secure remote access through SSH, ensures that all communications and data transfers are protected from interception.
In the context of remote IoT device management, SSH serves as a cornerstone. It enables administrators and developers to securely connect to and manage devices, perform maintenance tasks, and troubleshoot issues. Moreover, SSH can also be used to create secure tunnels for data transfer, and to access services running on the IoT devices.
Maximizing ROI with Remote IoT Device Monitoring
Maximizing the Return on Investment (ROI) from your IoT deployment requires robust monitoring and management strategies. Remote monitoring capabilities, facilitated by secure connections like SSH, play a critical role in achieving this. Remote monitoring helps maximize ROI in the following ways:
- Predictive Maintenance: By monitoring device performance, you can predict when devices might fail and perform preventative maintenance, minimizing downtime.
- Improved Efficiency: Remote management allows for faster troubleshooting and resolution of issues, increasing the efficiency of your operations.
- Data-Driven Insights: Collecting and analyzing data from remote devices provides valuable insights into device performance, allowing for better decision-making.
- Reduced Operational Costs: Remote management reduces the need for on-site visits, which lowers operational costs.
By implementing a secure remote access solution like SSH, you can ensure that your IoT devices are always accessible, manageable, and secure. This not only improves your ROI but also ensures the long-term success of your IoT deployments.
Further Configuration
When you open a tunnel, you can choose the quick setup or the manual setup method for opening a tunnel into the remote device. The manual setup method gives you more control over the configuration. For the detailed explanation of how to configure the manual setup you can explore the documentation. By exploring the documentation, you can:
- Prerequisites for Manual Setup Method: Understand the necessary requirements to start the setup, including the device you will use and necessary steps you must take.
- Open a Tunnel: This step will show you how to configure and open a tunnel for your device.
- Resend Tunnel Access Tokens: Understand how to access and manage the authentication tokens which will be used to secure your device.
- Configure and Start the Local Proxy: Know how to create a local proxy, as this is crucial for accessing your remote IoT devices.
- Start an SSH Session: This section will teach you how to securely start an SSH session with your device using the created tunnel.
- Cleaning Up: Learn how to close the tunnel once the management work is done.
Securing Your Raspberry Pi with SSH
Raspberry Pi is a popular choice for IoT projects, and securing it via SSH is essential. Here's a summary of how to secure SSH access on your Raspberry Pi:
- Enable SSH: Make sure SSH is enabled. By default, it's often disabled. You can enable it using `raspi-config` or by creating an empty file named `ssh` in the boot partition of your SD card before booting the Pi.
- Change the Default Password: Immediately change the default password for the `pi` user to prevent unauthorized access.
- Use Strong Passwords or SSH Keys: Use strong, unique passwords or, preferably, set up SSH key-based authentication.
- Update Software Regularly: Keep the Raspberry Pi's software up-to-date by running `sudo apt update` and `sudo apt upgrade`.
- Configure the Firewall: Configure the firewall (iptables or ufw) to only allow SSH traffic from trusted IP addresses and to drop all other traffic.
- Change the SSH Port: Change the default SSH port (22) to a less common port to reduce the risk of automated attacks.
- Disable Password Authentication: For enhanced security, disable password authentication and only allow SSH key-based authentication.
- Monitor SSH Logs: Monitor SSH logs (e.g., `/var/log/auth.log`) for any suspicious activity, such as failed login attempts.
By following these steps, you can create a secure SSH environment on your Raspberry Pi and protect it from potential threats.
Remote.it's Virtual Router Revolutionizing IoT
Remote.it offers a virtual router that can be integrated with your remote access setup. It simplifies the process of managing and securing IoT devices and eliminates the need for complex network configurations. This offers the following key features:
- Easy Setup: Simplifying the setup, making the remote access process more manageable for users.
- Secure Connections: The Virtual Router offers end-to-end encryption, safeguarding the data and the communication.
- Device Management: Manage and monitor all your connected devices from the centralized interface.
- No Network Changes: With the virtual router, you dont need to make any changes to your network configuration.
By using remote.its virtual router, you can significantly streamline the remote access process, improving the security and the efficiency of your operations.
Use SSH Tunnels to Securely Transfer Data Between Devices
SSH tunnels create encrypted connections, ensuring that all the data transferred over the tunnel is safe from eavesdropping and tampering. You can use the following steps:
- Port Forwarding: Configure port forwarding to direct traffic through the tunnel.
- Secure Data Transfer: Use the SSH tunnel to send and receive data securely.
Using SSH tunnels is a very efficient way to ensure data security when transferring data between IoT devices.
Securing Your Private Key with a Passphrase
Protecting your private key with a passphrase is one of the fundamental security practices. Follow these steps:
- Generate an SSH Key: Generate an SSH key pair with a passphrase.
- Enter a Passphrase: The system will prompt you to create and enter a passphrase.
- Use Key with a Passphrase: When you use your key, you will be required to enter your passphrase, preventing unauthorized access if the key is compromised.
Using passphrases with private keys adds an extra layer of protection.
The Manual Setup Method
The manual setup method allows you to have more control over your SSH connection configurations. Here is the breakdown:
- Manual Setup: Use the manual setup to gain more control.
- Configure Local Proxy: Configure and start the local proxy to connect to the remote device.
Conclusion
In conclusion, SSH is a powerful tool for securing and managing your IoT devices remotely. By understanding the fundamentals of SSH, implementing best practices, and staying informed about potential security threats, you can create a robust and reliable remote access solution. The ability to securely access and manage your devices is crucial for the success of any IoT deployment. With the right knowledge and tools, you can ensure the security, efficiency, and long-term viability of your IoT infrastructure. Embrace the power of SSH, and take control of your connected world, wherever you may be.


